As overlanders we love to get away from it all, often parking up in remote areas without telephone or internet connectivity. Some of these areas also experience severe weather, so how can we keep an eye on the weather without a phone signal? Sure, we could call someone using a satellite phone, but that’s expensive and relies on someone else to help. How about just downloading some satellite images directly from the weather satellite as they fly over? It is actually quite cheap to do – under US$50 – and the equipment is small and easy to carry.
Software
There is little point in me repeating the excellent information provided by others, so here are links to the websites I used to get my system up and running:
- This is where I started, it has a great description of all the software needed (all free) including links to the download sites. https://www.rtl-sdr.com/rtl-sdr-tutorial-receiving-noaa-weather-satellite-images/
- If you want total geek overload, everything you could want to know about the NOAA weather satellites is here. https://noaasis.noaa.gov/NOAASIS/pubs/Users_Guide-Building_Receive_Stations_March_2009.pdf
I already had a Nooelec NESDR Mini 2 software defined radio (only US$23). This is simply a small radio in a USB stick that plugs into my lap-top’s USB port and controlled with a software package. I’m using the HDSDR software package, the link below shows the Nooelec NESDR Mini 2 and the ‘Download’ tab has links to the drivers and HDSDR software: https://www.nooelec.com/store/sdr/sdr-receivers/nesdr-mini-2.html
The next piece of software I use is VB Audio (https://www.vb-audio.com/Cable/index.htm). This allows the audio output of the HDSDR software to be routed directly to the weather satellite decoding software – it’s like a virtual cable connecting the headphone socket to the microphone socket.
The final piece of software I use is ‘WX to Image’, available here: https://web.archive.org/web/20171209052450/http://www.wxtoimg.com:80/downloads/
I don’t intend to go through all the software in detail as it’s all very well explained in the links above. Once all the above is set up, the only things to update occasionally (once a month or so) are the Keplers within the WX to Image software. These are the satellite orbit data files; they are quite small and don’t use much data to update. Simply select ‘File’ then ‘Update Keplers’ within the ‘WX to Image’ software.
Hardware
A software defined radio is required. I used a Nooelec NESDR Mini 2 but there are many others available. It will need to be able to work at 137 MHz which I would imagine almost all will do. A length of aerial cable is also required. I just bought some standard TV aerial cable from a hardware shop. In an ideal world, I would have the correct connectors for the aerial cable. The Nooelec NESDR Mini 2 has an MCX aerial connector. I already had an MCX to SMA adapter and a short SMA male to SMA female extension cable.
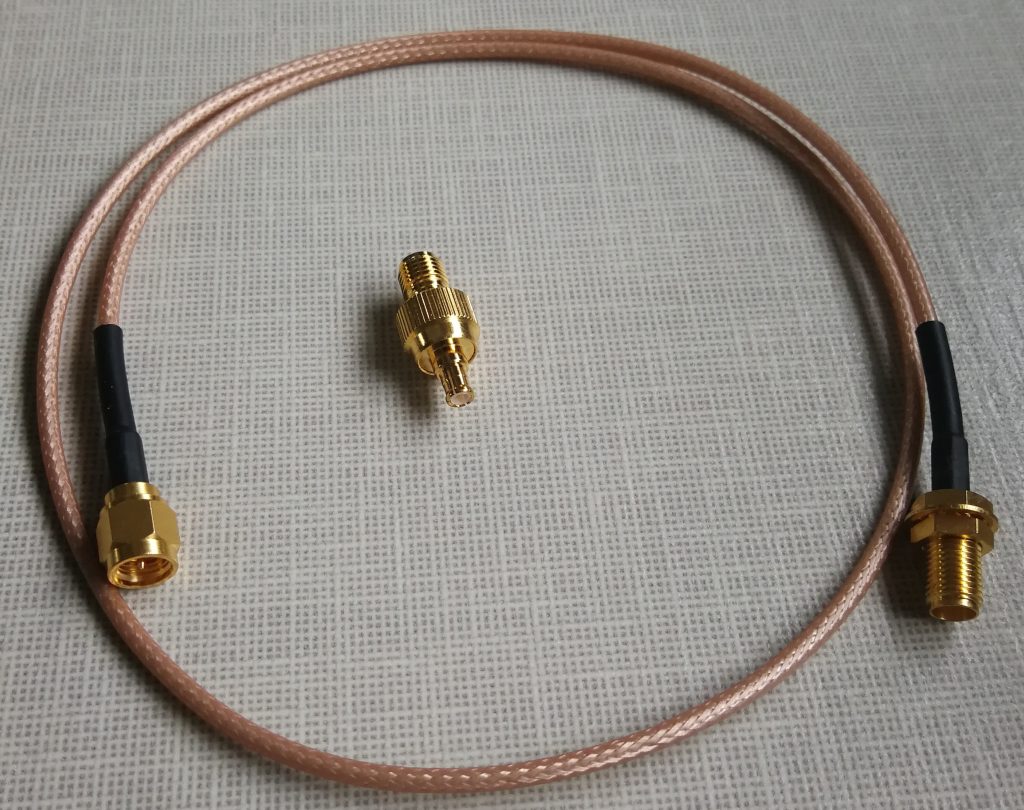
I simply pushed the centre core of the aerial cable into the SMA female socket and used electrical tape to hold the screen wire and cable in place around the outside of the SMA female socket.
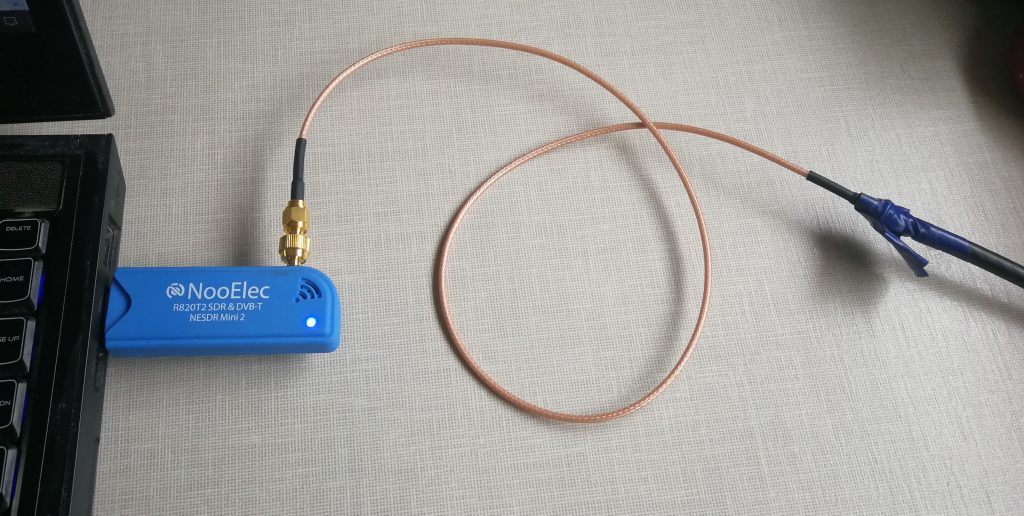
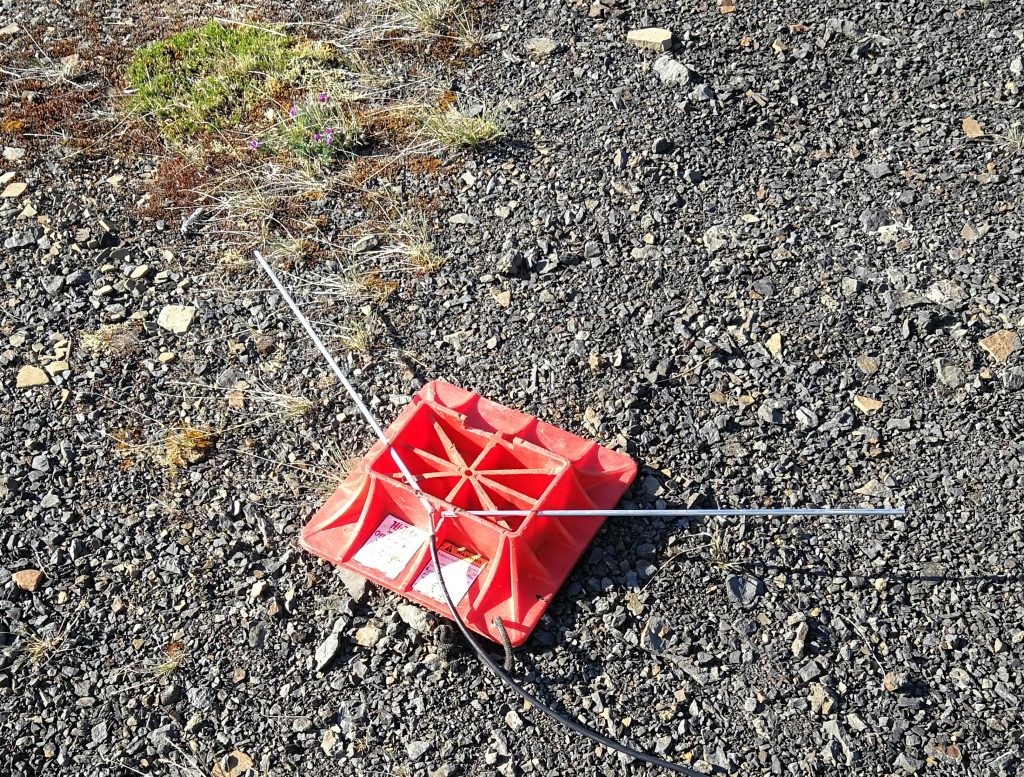
Don’t worry about all these connector names, the websites that sell these software defined radios have all the connectors and adaptor you need. I have ordered some proper connectors, but this is good enough to get workable images! For the aerial I bought two lengths of aluminium rod from a hardware shop and followed these instructions: https://www.rtl-sdr.com/simple-noaameteor-weather-satellite-antenna-137-mhz-v-dipole/. I cut the rods to a length of 510 mm and drilled a hole in the end to insert a self-tapping screw (these are used to attach the wires).
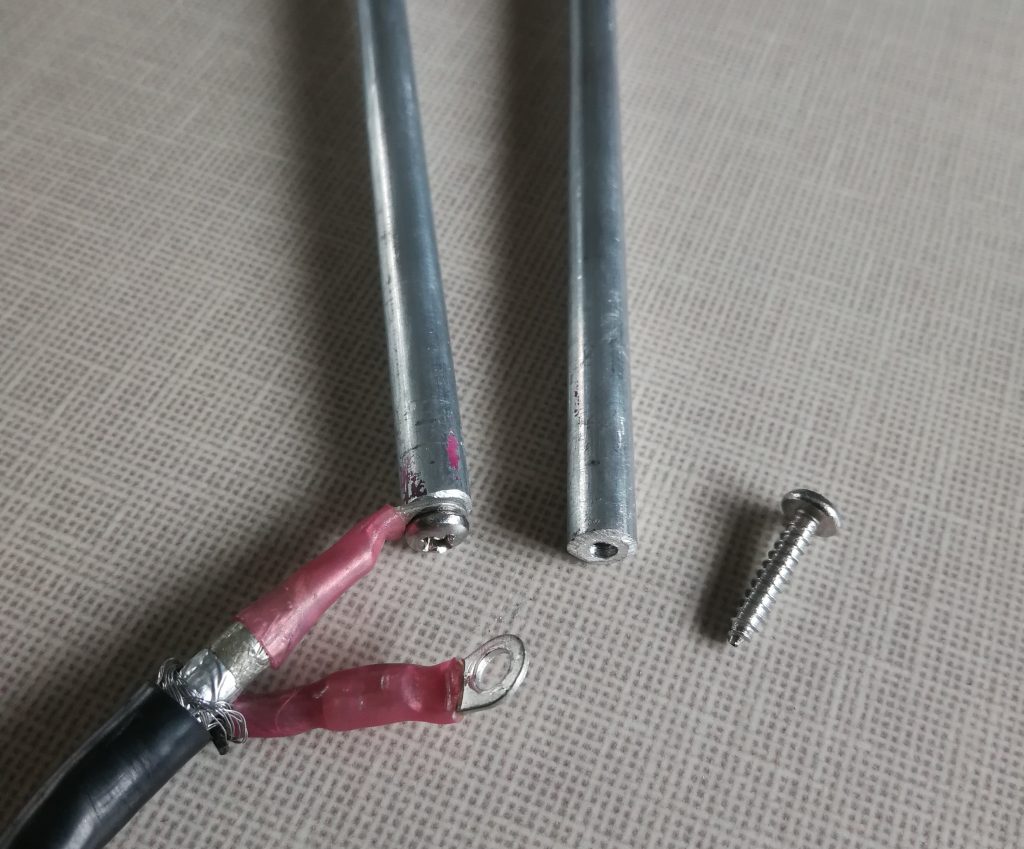
The two aluminium rods need to be held in place at an angle of 120 degrees. To achieve this, I drilled a couple of holes in my Hi-lift jack stand (so the rods can be easily removed and packed away) but obviously, any improvised way of setting them at an angle of 120 degrees will do.
Images
In the ‘WX to Image’ software you need to set your position and altitude in the ‘Options’ tab, ‘Ground station location’. Then under ‘File’, ‘Satellite pass list’ you will see all the satellite passes predicted for that position for the next month! The maximum elevation level (MEL) is quite useful: the closer to 90 (directly overhead) the better. The E or W is whether the satellite will pass to the east or west of your position. In remote areas I just put my aerial on the ground, so using the E or W function allows me to choose which side of the truck to put it.
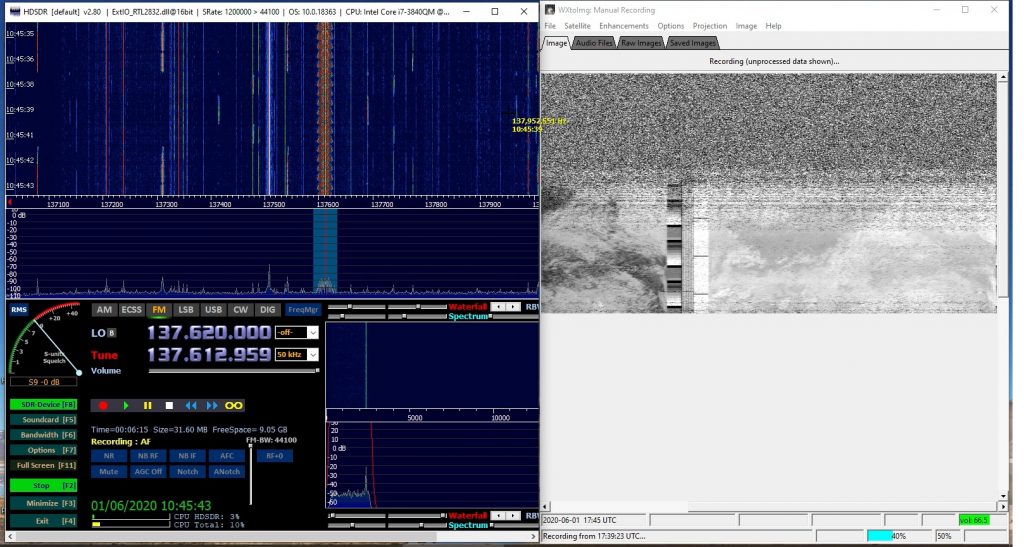
At the time I was developing and testing the system we were parked-up in a town. I put the aerial on the roof of the truck, but there is a lot of noise in a town environment (Cell phones, Wi-Fi etc). Also, the horizon was not visible, so the satellite signal could only be received for part of its fly past. Nevertheless, I was still able to produce a usable image in town.
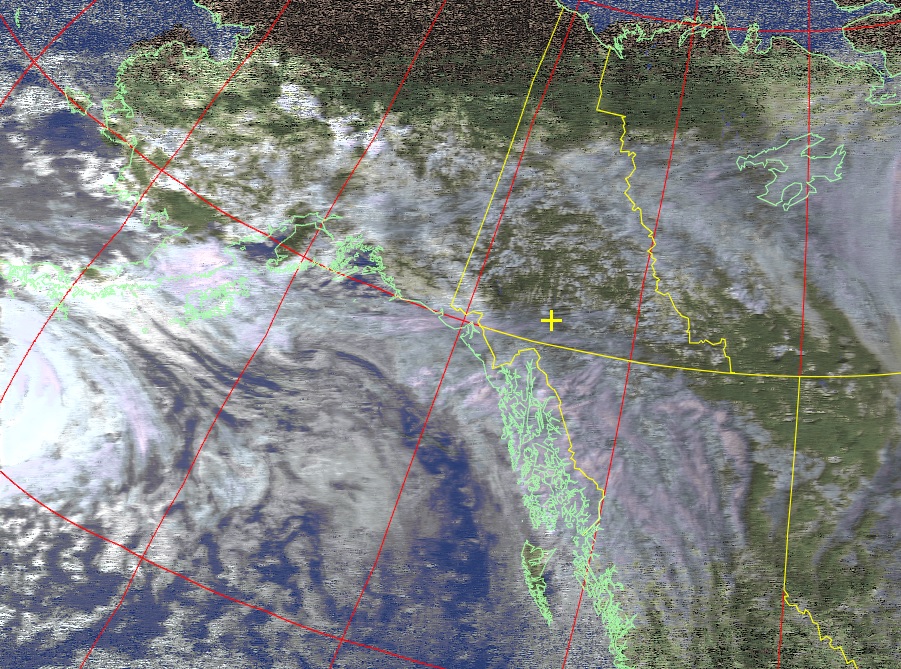
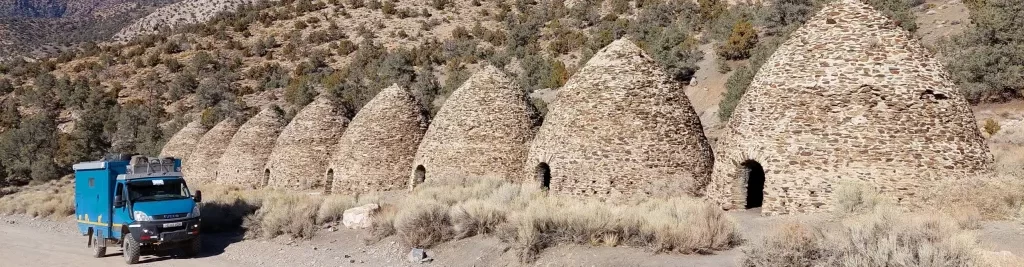
The next time I used the system we were parked in a very remote area, north of the Arctic Circle – no noise or obstructions out here!
The images download line by line, either starting at the top for a southerly heading satellite or the bottom for a northerly heading satellite. The satellites take about 12 minutes to fly from horizon to horizon if they are passing directly above. It’s best to get one that flies directly overhead. There are normally a couple each day passing close to directly overhead, but usable results are possible from satellites passing either side too (above about 40 degrees (MEL)).
The image is centred on your position so even with a weak signal, the strongest part of the signal is overhead your position, so there is a good chance of getting a usable image.
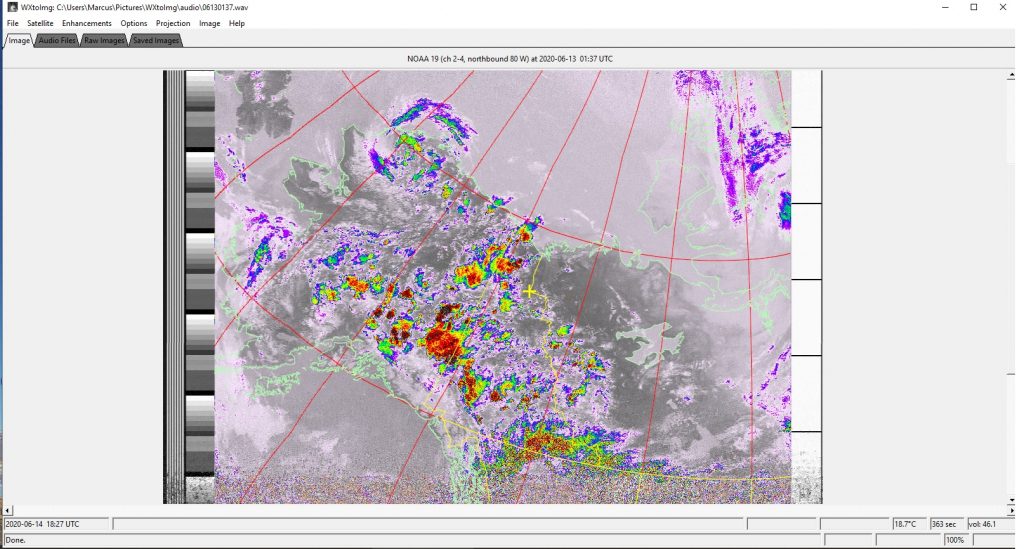
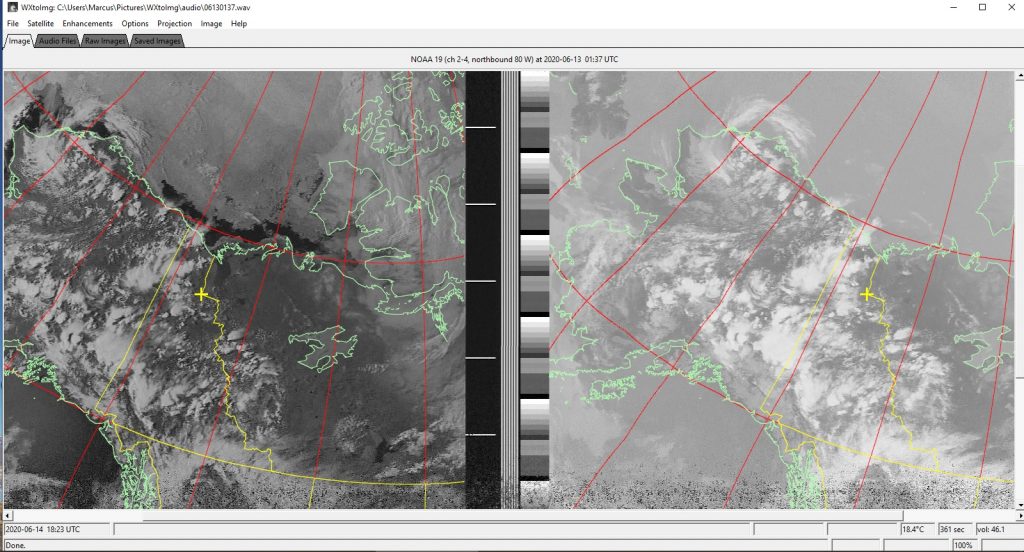
The left image is visible light and the one on the right is infa-red. Moving the curser over the right image will give a temperature for that point (in the box bottom right). These images are quite nice, like a long-range selfie 😊. However, the software can do some cleaver things combining the two images to give a lot more information.
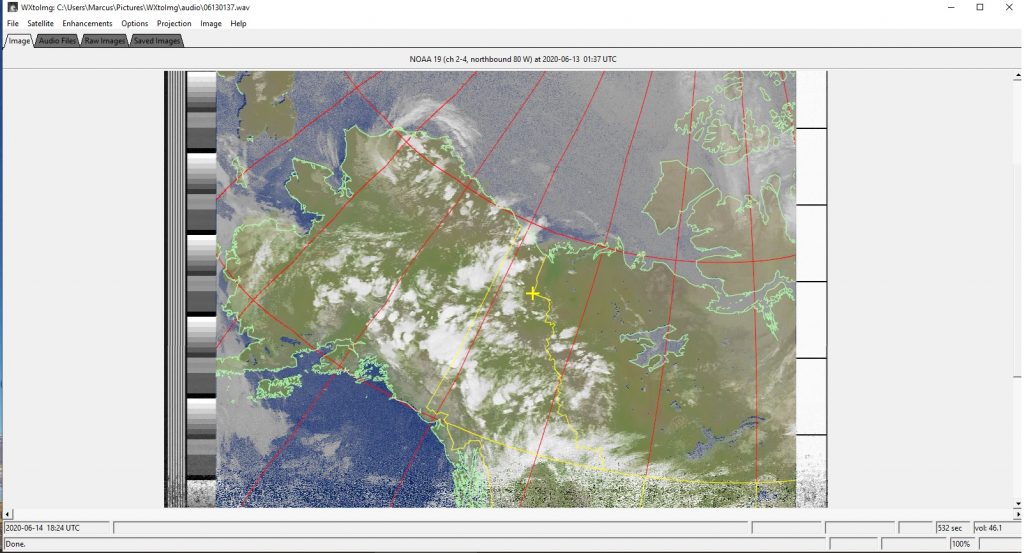
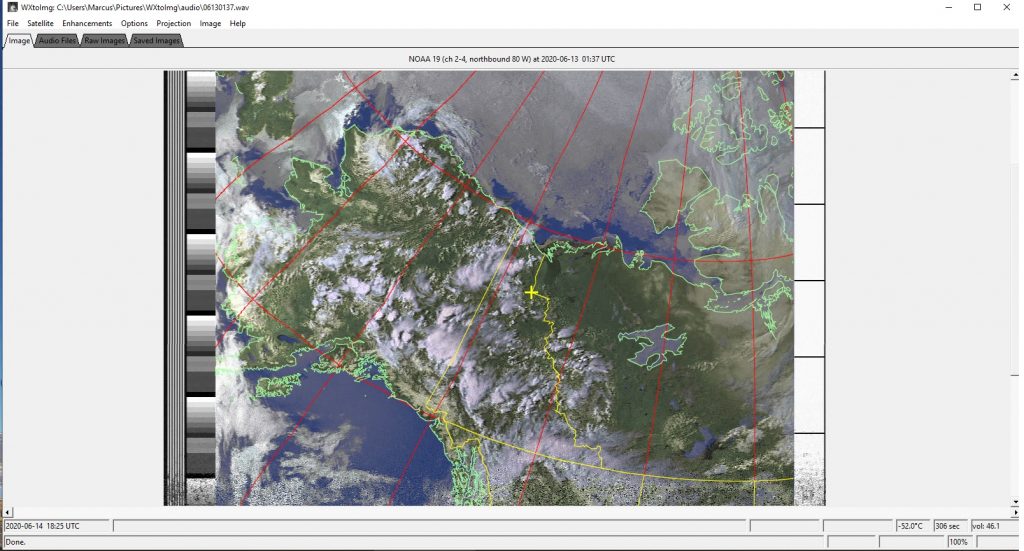
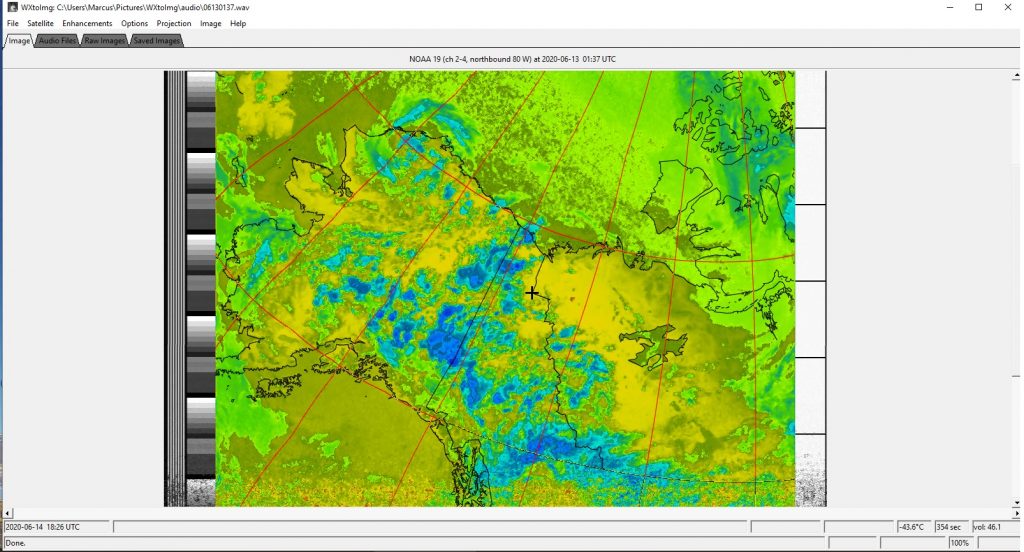
Have a play with the various settings under the ‘Enhancements’ tab. The various images produced show temperatures, enhance clouds, and show where potential storms/heavy rain or snow could be. Obviously, hurricanes etc are even easier to see. Here are some examples that I produced from a single satellite pass download; our position is marked by the cross:
IR colour map
MSA Multispectral Analysis
Thermal
NO colour IR enhanced