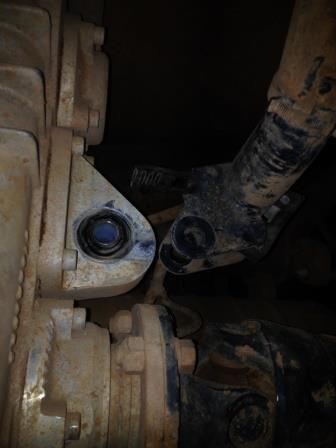
The transfer case gearbox is mounted with 3 anti-vibration bushes: two at the top of the gearbox and one on the rear. From my internet research, it seems that the rear of these 3 bushes is prone to early failure. One of the symptoms is a knocking noise from the gearbox when pulling away. Here’s what I found with the transfer gearbox bush:
Cuthbert’s rear anti-vibration bush failed while in the mountains of the Eastern Highlands of Zimbabwe. Unfortunately there are no Iveco dealers in this area, so an ‘in-field’ repair was required. On inspection, I found that with the rear anti-vibration bush failure, the transfer case gearbox could be easily rocked forwards and backwards by hand. This movement needed to be prevented. I was able to insert a rubber ‘quick-fist’ clamp into the space between the chassis cross-member support and the transfer case gearbox mounting point. This clamp was held in place with a tie-wrap and prevented the gearbox from moving.
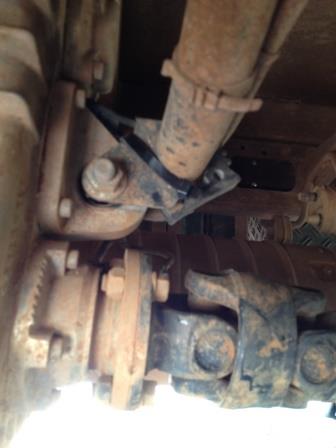
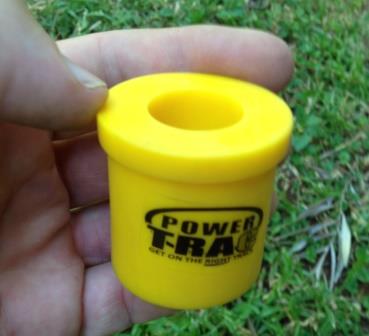
The repair worked well to get us out of the mountains but I wanted to make a better repair. In Bulawayo I was unable to buy the correct part, but I did find a new anti-vibration bush insert.
To get access to the gearbox bush, I could either lower the gearbox or move the chassis cross-member. I decided to move the chassis cross member as this only required the removal of six bolts (and loosening two others, so that it could be swung out of the way).
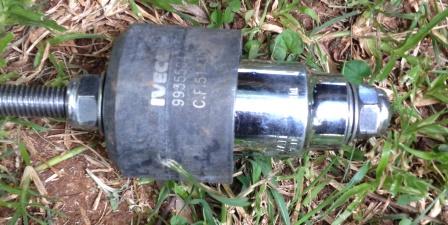
The original anti-vibration bush is pressed into the casing and would require a bench press to remove, which I obviously do not have with me. I therefore needed to clean out the rubber which remained inside the original bush. My 26mm socket was a very close fit with the inside of the bush. I positioned the 26mm socket on one side of the bush and put another larger socket on the other side of the bush. Then I put an M12 threaded rod through the two sockets and the bush. Then by tightening nuts on either end of the threaded rod I was able to force the 26mm socket through the bush which removed all remaining rubber from within the old bush housing.
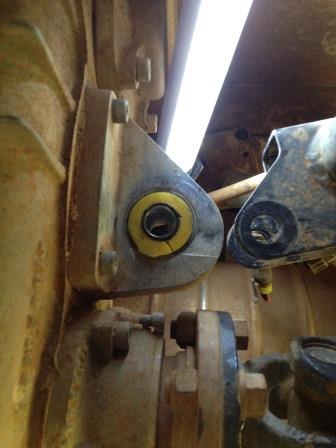
I then cut down the new bush to fit within the old bush housing and inserted it into the housing. I then cleaned up the centre tube from the original bush; this was quite easy as most of the rubber had already shredded and fallen off (which was the cause of the original failure). I then inserted this tube into the new bush, which required the bolt to be put into the tube to protect the tube whilst it was tapped into position with a mallet.
The chassis cross member was then swung back into position and everything bolted back together – fixed!
Update
Once back in UK, we booked Cuthbert into the local Iveco dealer garage to have the transfer case bushes replaced. The 4×4 is quite rare in UK, so the dealer had to order the bushes which took a few days to arrive. By this time all 3 bushes needed replacing; my temporary fix was holding up well but it made sense to have a new set of 3 fitted under the warranty.
At the Iveco garage we hit a problem when work started: the bushes supplied by Iveco were the wrong size for the vehicle! The staff checked the parts catalogue and the part numbers on the new parts supplied by Iveco – all were correct, but the new bushes were about 10 mm smaller in diameter and were obviously not going to be of any use.
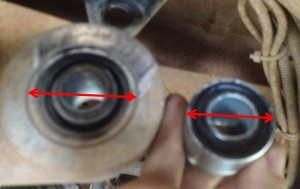
Not a great photo but you can see the difference in diameter between my existing bush and the new part Iveco think is correct!
The transfer case was now hanging below the truck in the workshop, so they obviously needed to find a solution to get Cuthbert back on the road. The mechanics had seen my ‘quick fix’ for the rear bush and decided they could do a similar, but slightly better, fix for me. They had in stock, a set of bushes from www.polybush.co.uk for the front suspension wishbone on a Daily 4×2 and decided to use these.
As an aside… it seems that they don’t use the Iveco-supplied bushes because, apparently, they don’t last (perhaps Iveco need to get their rubber sorted!?) Anyway… these wishbone bushes have a larger outer diameter, but a local machine shop quickly turned them down to size for us. The old rubber was cleaned out of the existing bushes, leaving the old outer-casing in place. The new bushes were inserted into the old outer-casings and the transfer case was reinstalled.
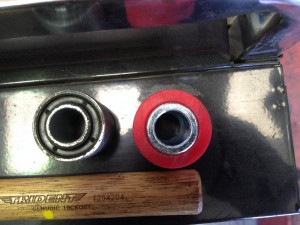
The wrong bush (too small) on the left and the locally made one ready to fit in the old bushes outer casing on the right.
One down-side to these new bushes is that they are made of a much stronger and harder wearing material, which could in theory lead to more transmission noise while driving. The corresponding advantage however, is that they should be much more hard wearing and much easier to replace (although I suspect they will outlast the original type of bushes many times over).
Having now driven for a few days on these new bushes, I can say that we haven’t yet noticed any additional transmission noise. The drive chain is now really nice and all the slack and clunking when pulling away has completely gone. A job well done!

